


Apr 04, 2017
There are several approaches to creating logos in Illustrator.
Today we're going share one approach using Illustrator CC.
Imagine you own Woop Woop Garden Supplies and you have very little experience in creating logos in Illustrator. We'll here's your chance.
Follow these step by step guides to get started.
Firstly select the Ellipse tool from the Shapes tool in the left hand tool bar. Ensure the Stroke button down below the tool bar is set to black. If not, double click the stroke button to enter into the Colour Picker window to select black for the stroke colour. Hold onto the shift key as you drag from top left of the artboard to the bottom right to retain the aspect proportions of the ellipse.
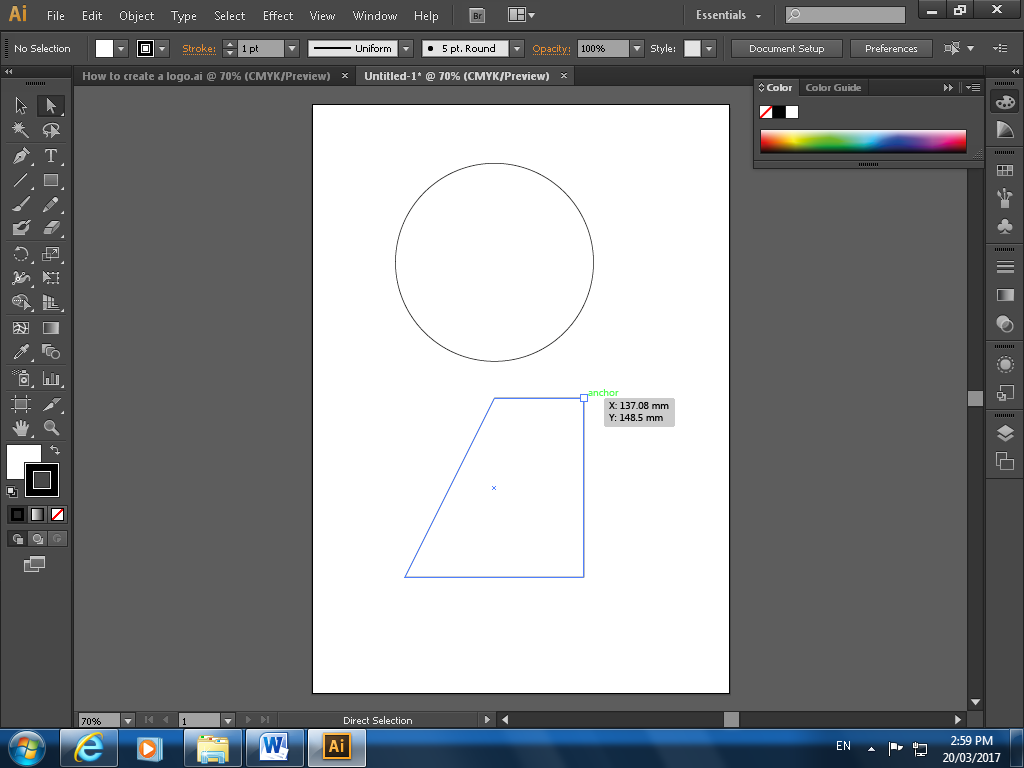
Secondly, create a square from the Shapes tool and with the Direct Selection cursor select the hollow points on the top side of the rectangle and drag it to the centre to form a triangle.
With the triangle now created, place the triangle on top of the ellipse and place it close to the centre point of the ellipse.
If the Smart Guides are turned on and can be from the View menu, you can place objects more accurately across an Artboard with the mark-ups provided. By having overlapped shape paths we can create further complex paths with the Pathfinder tool. Create a copy of the triangle that will form a part of the logo.

Select the Window menu and from the list select Pathfinder.
Select b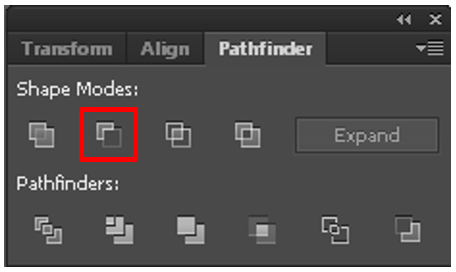 oth the ellipse and the triangle and in the Pathfinder window, select Minus Front in the Shape Modes group.
You will now see the top of the triangle now removes the bottom section of the ellipse forming another shape. Position the triangle duplicate below the triangle groove and leave a small gap between as part of the overall design of the logo.
With the Line tool selected, create a line in the middle of the two shapes. Once again by holding onto the Shift key as you drag from end to another that will create a straight line.
We will select the Shape Builder tool to create divisions in the two shapes to give certain fill colours.
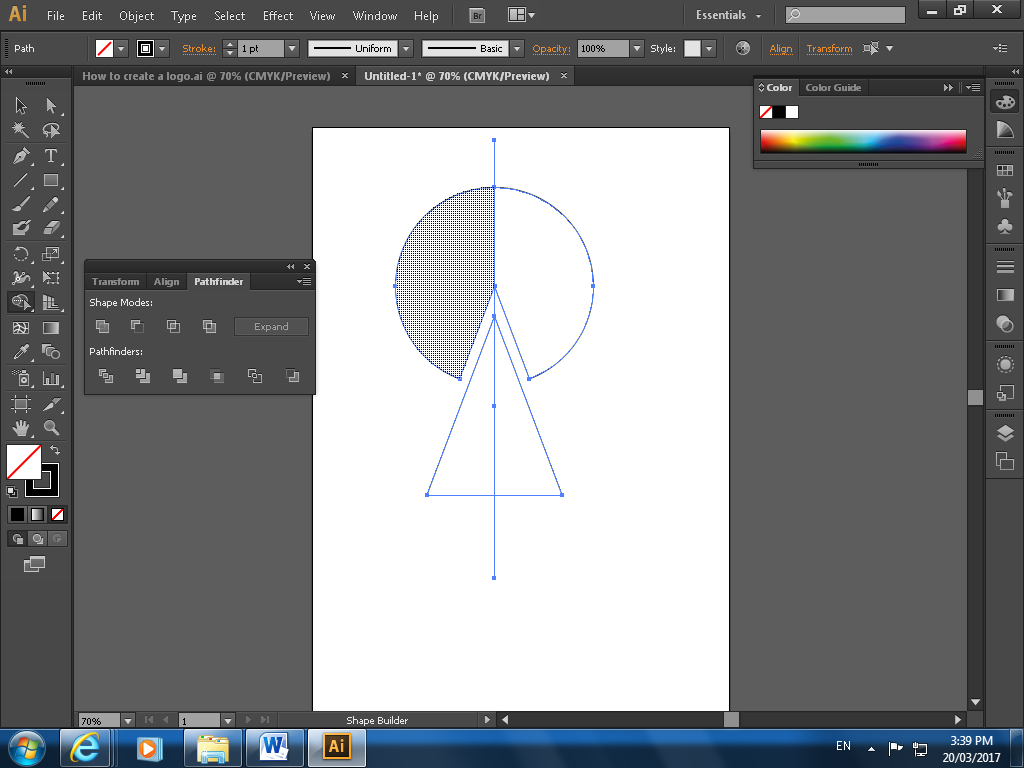
Select shapes and the line and with the Shape Builder selected, hover the cursor over the left or the right half of both shapes and click the shaded area to create divisions over the two shapes.
The additional ends of the middle line on the top, bottom and middle can now be deleted. 
With the divisions created over the two shapes, apply to the selected halves with colours and apply a slightly lighter colour over the second halves to create a certain effect.
Select all divisions and by referring to the Fill and Stroke buttons, click once of the stroke button so it becomes the foreground element and select the None (button which has a red diagonal line) to remove all stroke lines.
We have now created the visual effect in this logo. Woop Woop! Further to the logo you may want to create a background and add text to it. For more advanced support in using Illustrator, or starting out in graphic design – take a look at our Illustrator training courses.

How do your Excel skills stack up?
Test NowRelated Articles


About the Author:
Keith Ching

At New Horizons Keith delivers Microsoft Office, Sharepoint and Adobe/ Graphic Design training to corporate Australians. Because of his proven ability to build rapport with Clients, Keith has been engaged on training projects that have required expertise outside of the traditional instructing role.Keith also enjoys sharing his knowledge with others, in particular in educating students who contribute to our local ICT industry and economy. In doing so Keith has delivered high quality training to over 4000 students at an average of 92%.In a competitive industry which constantly changes, Keith has a unique skill set which is up-to-date with the latest technology combined with being able to communicate this technical knowledge in a way that students relate to in an engaging, clear and concise manner.His passion in IT and Art and Design has resulted in several recognised qualifications which are a reflection of his creditability by peers and industry.
Read full bio


Next up:
- Close All Excel Files at Once
- Reuse and Share InDesign Presets
- Setting up an Azure AD Connect Staging Mode
- The Windows 10 Calculator – A Quick Squiz
- Get Creative with Adobe Stock Templates!
- ITIL® is Is Not a Four Letter Word
- The Benefits of Office 365
- ITIL® Practitioner – Looking at the nine guiding principles
- ITIL® Practitioner Guidelines – Start Where You Are
- Get Microsoft Certified
Previously
- Close All Excel Files at Once
- Reuse and Share InDesign Presets
- Beyond resilience
- How-to: Use clipping masks for typography
- Is it really that hard to edit a Hosts file?
- RESILIA™ Hotspot
- How REAL is your reality?
- Nintex: Read data back into a new Repeating Section control
- Master Document in Word – Part 3
- A good presentation is not about you
