


Oct 16, 2015
For the next part of the series we want to start putting in some content into our site, this will be information we want to present on our resume. Topics will be work experience, education, hobbies and activities, some skill representations and a short about us section.
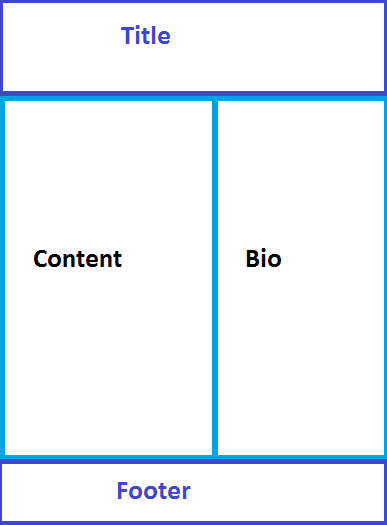
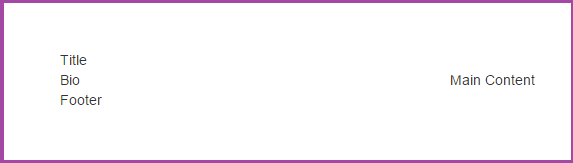
We will start from the top and make our way downwards; the styling of the website will be done at a later point. You can use your own styles or even make use of a style template. This resume site will consist of four areas. We will have the title on the top; have a small bio on the right, have content on the left of the bio that describes us the best and finally we finish it with a footer element.
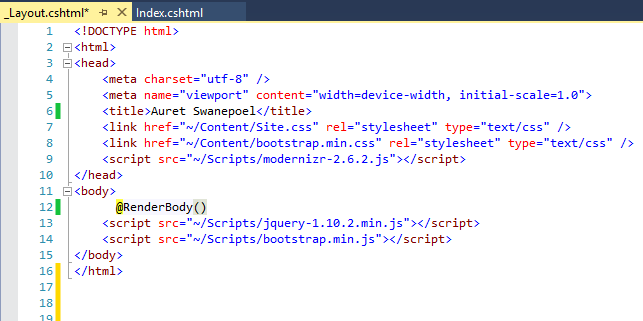
With that in mind, the first thing I will do is to clear the existing markup on the home page (so it is empty) as well as some of the markup on the layout page. Firstly I cleared out the body part of the layout view, leaving in only the “@RenderBody()” and the references to jQuery and bootstrap. Also, I will change the title value to represent my name. In the index view I have removed everything so it should be blank.
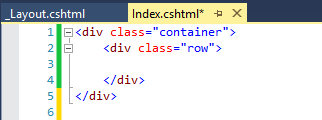
The next step is to add some elements to the Index view to start fleshing it out with content. Keeping in mind that this page will be rendered on the master page I am going to rely on bootstrap to do the styling and positioning from the beginning. So first we will add a div with a class of “container” and a secondary div that will use a class of “row”.
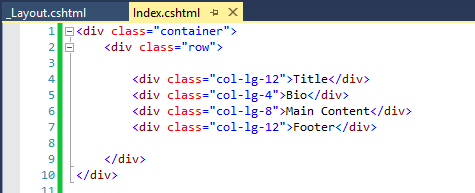
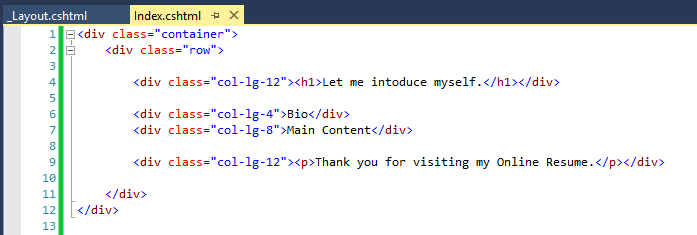
Next we will be nesting our 4 areas within the row element. To do this, I am going to create 4 div elements that will be siblings. These divs will use bootstrap classes for the initial styling, just to make life easier later on. They consist of the following:
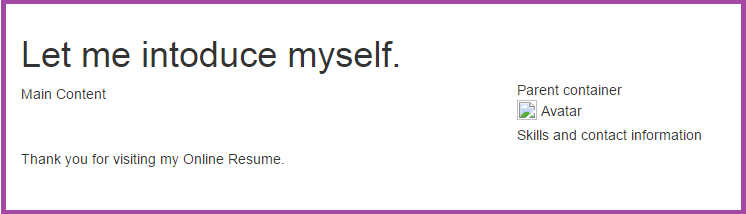
- Div element for the title with a span of 12 columns
- Div element for the short bio with a span of 4 columns
- Div element for the main content with a span of 8 columns, such as work experience
- Final div for the footer with a span of 12 columns
Your result will represent the following image (without the border):
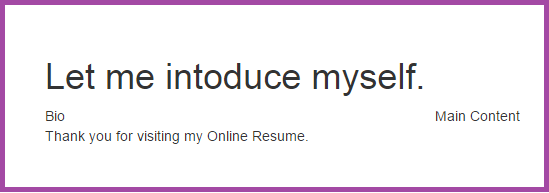
Next we will add some value to the Title and the Footer elements. For the Title we will use an h1 tag and for the footer I will just use a paragraph tag. The markup should now represent something like the following image.
Your result will then represent the following image (again without any borders):
The next part will be the bio section; this will consist of the following:
- An avatar image
- Full name
- Quick description of yourself
- Some skills you want to show case
- Finally some contact details
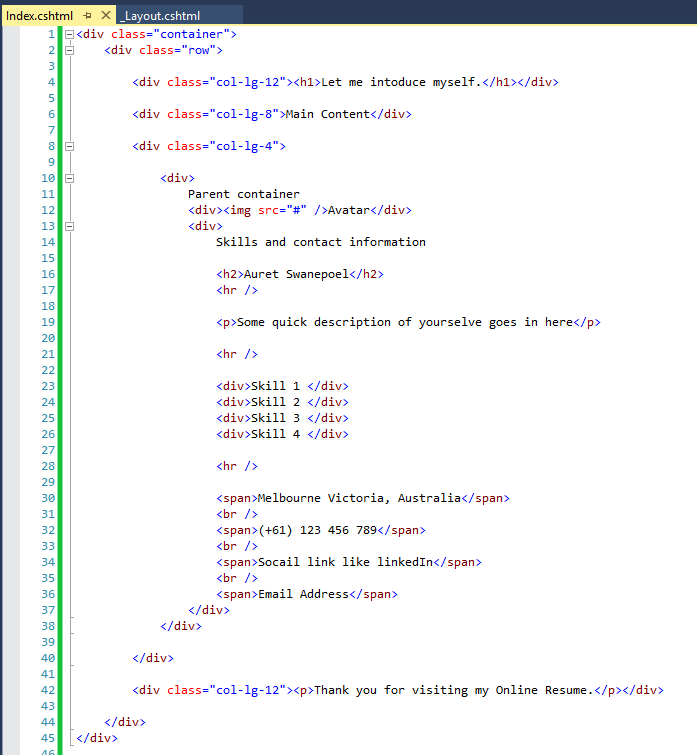
For this portion, I will create an element that will act as a parent for the bio’s content. Then I will create two sibling elements, one for the avatar image (containing an img tag) and one for the remaining information (containing more div elements). Your markup should now look like this:
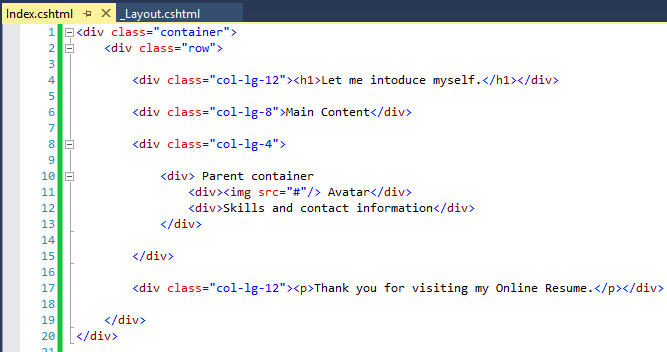
Your page should now look like this:
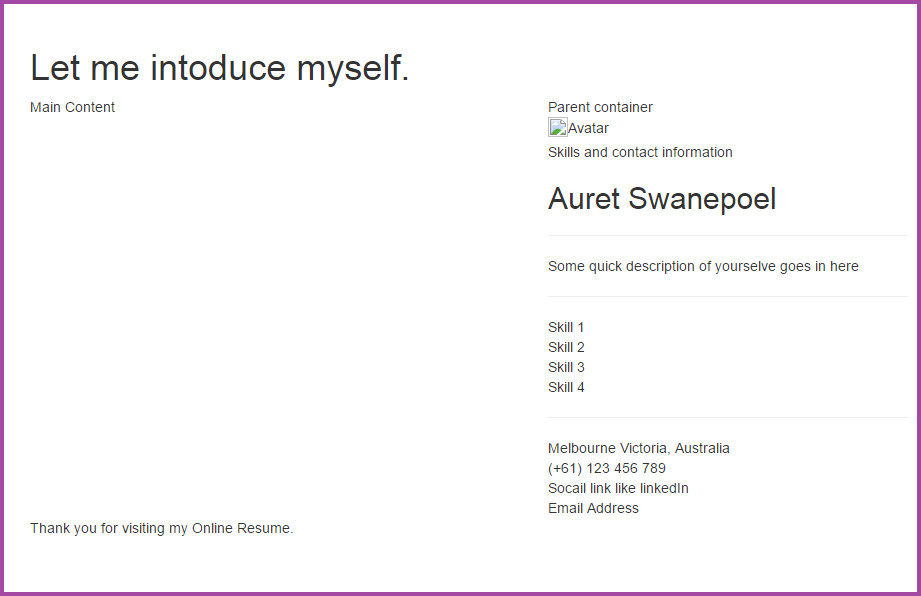
With that last portion out of the way, we will create elements to represent the full name, quick description, skills we want to add and finally the elements for the contact details.
We will be adding the following elements to our markup to show the rest of the bio
- H2 element for the full name.
- Some HR elements to create some space in-between the elements, just for spacing.
- A paragraph tag for the quick description.
- Div elements for each one of the skills we want to show, I’m using a total of 4.
- Span elements for each line in the contact section.
You should end up with a markup that resembles this:
Your page should now look like this:
This will conclude this part of creating a personal resume site.
How do your Excel skills stack up?
Test NowRelated Articles


About the Author:
Auret Swanepoel

As a recent addition to the New Horizons team, Auret is a highly skilled and qualified IT Technical trainer. He has been a Microsoft Certified Trainer (MCT) since 2008 and has since then, also become a Microsoft Certified Professional (MCP), a Microsoft Certified Technology Specialist (MCTS) and a Microsoft Certified Information Technology Professional (MCITP). With his international experience as a trainer in South Africa, Auret is able to adapt his teaching style to different audiences in the classroom and ensure that students are learning in a positive and collaborative environment.
Read full bio


Next up:
- Create Scenarios in Excel using cell names
- The awesomeness that is AngularJS - Part 2
- Speak well under pressure
- Absolute Cell References use in Formulas
- What is new in Office 2016
- Selecting Layers in a Visio Flowchart Diagram
- On the Checkout Option in SharePoint
- What they don't tell you about becoming a manager
- What’s new in Microsoft Dynamics CRM 2015?
- Power Map in Excel 2013
Previously
- Save time by using your Document Stencil
- Courage? …I’m feeling quietly confident
- Welcome to the new Edge
- Creating a simple Website and User Interface with MVC - Part 1
- Non-Breaking Spaces & Non-Breaking Hyphens in Word
- Deleting an undelete-able site collection
- What Customers Want
- The awesomeness that is AngularJS - Part 1
- Entity Framework Code-First
- Introduction to Office 365 Video
