


Nov 02, 2015
We will conclude the resume site with this last blog entry, we will be adding the needed styles to make the site appealing to look at. To create the required look and feel of the application I will be using wrap bootstrap, this is a site that provides you with some bootstrap templates that you can purchase and use.
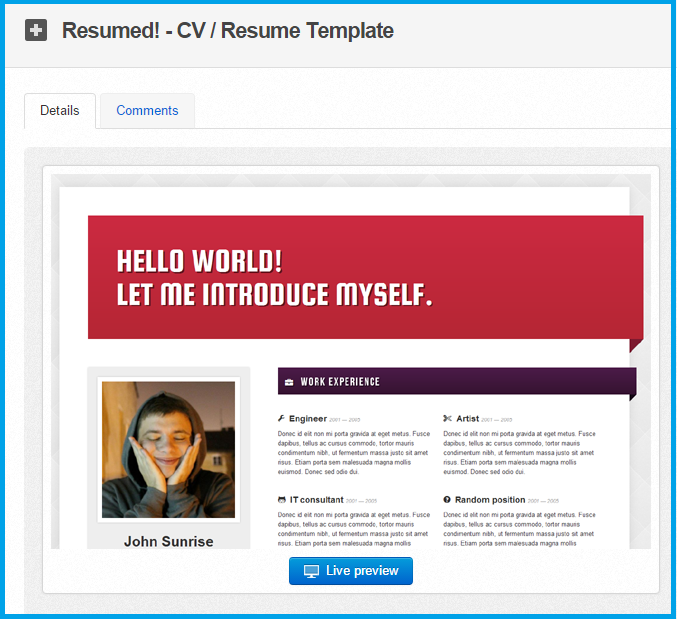
The template I will be using is called the “Resumed!” template. These templates come with predefined CSS and JavaScript files that can be used to style your website.
Once you have the needed template of your choosing you download the files included in the template, the files in this template are organised into the following format.
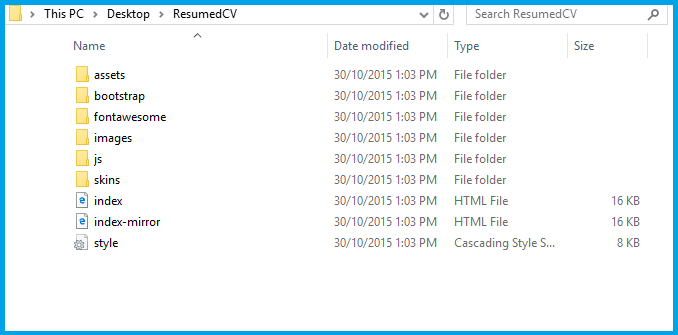
Each of these folders contain the needed CSS files or JavaScript files related to the final styling of the website. Included in the files is a page that shows you the end product of the template you have bought.
Once we have the files downloaded we just need to add them to our project, this will allow us to reference the files and use the functionality within the files. Now I already have bootstrap and JQuery referenced inside of my project, so no need to add them to the project.
However I do need to add the files that I don’t have in the project yet, such as “fontawesome” and the style.css file. Once you have added all the needed files you are ready to continue.

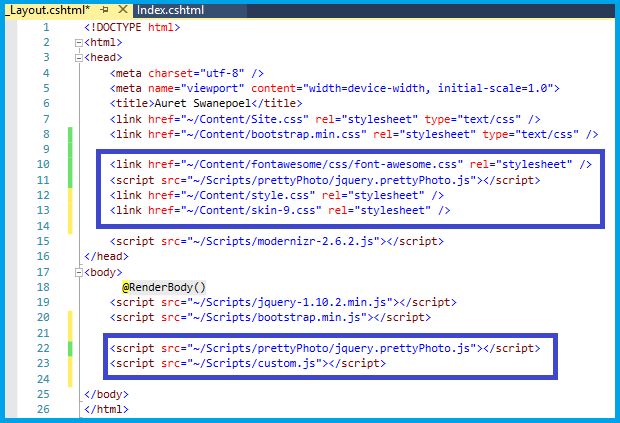
The next step is to add all the needed references to the newly added files, otherwise they won’t be used at all. To perform this action go on to your layout page and manually add the references to the body and the head tags.
After you have the needed files referenced you need to start decorating the html element with the appropriate classes to represent the style of the template, as well as removing any unneeded content from the page.
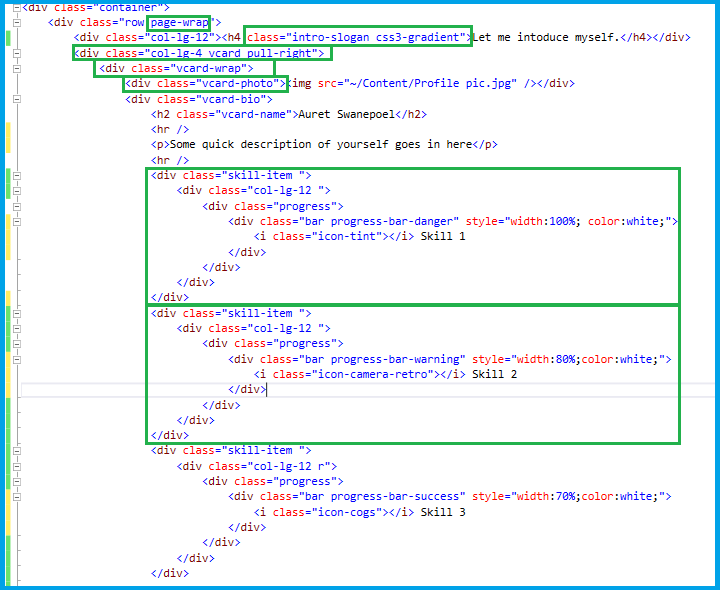
In the previous image you can see that the green highlighted areas are the elements that I started to modify to reflect the classes that are used within the stylesheet of the template. You will change your page to reflect the template that you have downloaded, you are not limited to the template you can still add your own classes as you see fit.
While you are adding the styles and the needed elements from the template on to your page constantly check to see if it is shaping up to the end result you have in mind, if it isn’t then just change the elements to meet your needs.
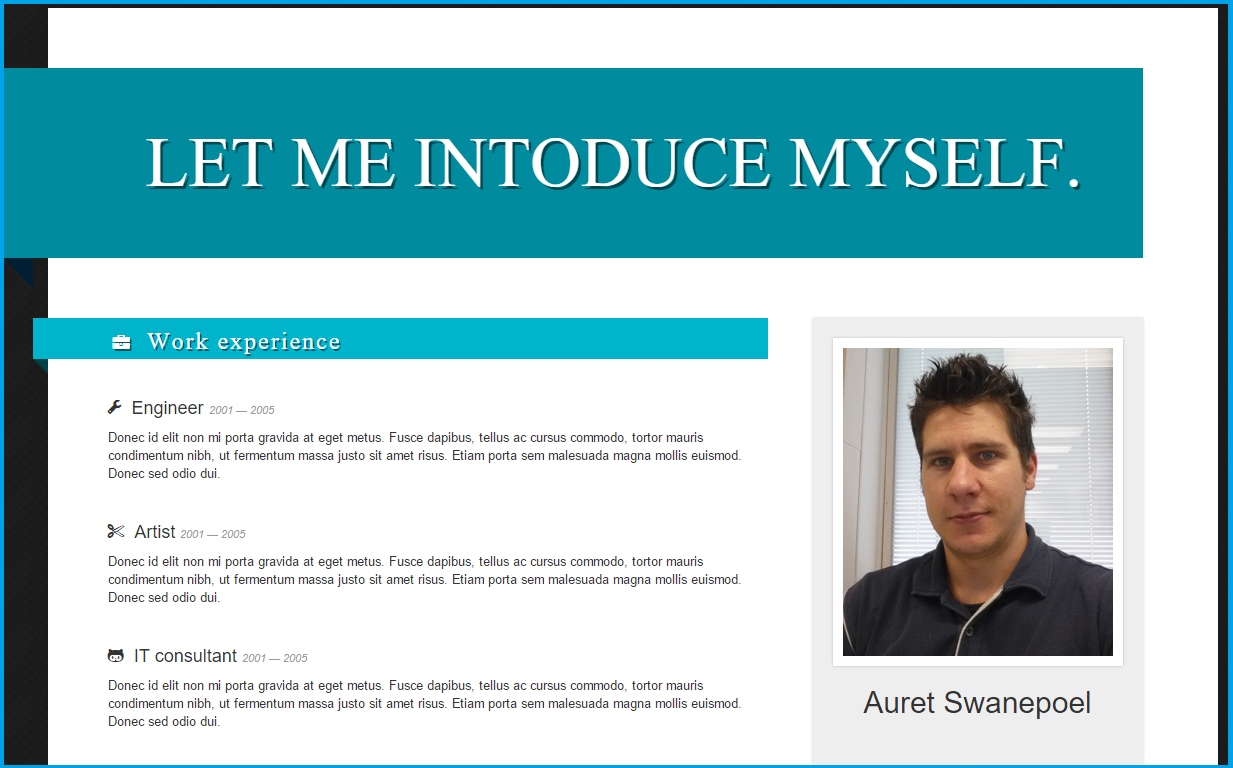
After I made all my adjustments to my elements and included the needed style changes that I wanted to make this was my end result. Once again you are free to change the page to meet your needs however you see necessary.
How do your Excel skills stack up?
Test NowRelated Articles


About the Author:
Auret Swanepoel

As a recent addition to the New Horizons team, Auret is a highly skilled and qualified IT Technical trainer. He has been a Microsoft Certified Trainer (MCT) since 2008 and has since then, also become a Microsoft Certified Professional (MCP), a Microsoft Certified Technology Specialist (MCTS) and a Microsoft Certified Information Technology Professional (MCITP). With his international experience as a trainer in South Africa, Auret is able to adapt his teaching style to different audiences in the classroom and ensure that students are learning in a positive and collaborative environment.
Read full bio


Next up:
- Microsoft Word: Make an Exclusion Dictionary
- The Power of the Paragraph
- What's new in Skype for Business
- Decorate Your Office
- Drag and Drop
- I wasn't meant to send that!
- Is your ‘Human Capital’ stock going up or down?
- Customise the navigation drop-down in SharePoint
- From Rivals to Friends … The rise of a new behemoth – The Red Microsoft Hat.
- The Quick Brown Fox...
Previously
- Power Map in Excel 2013
- What’s new in Microsoft Dynamics CRM 2015?
- What they don't tell you about becoming a manager
- On the Checkout Option in SharePoint
- Selecting Layers in a Visio Flowchart Diagram
- What is new in Office 2016
- Absolute Cell References use in Formulas
- Speak well under pressure
- The awesomeness that is AngularJS - Part 2
- Create Scenarios in Excel using cell names
